
So guess what? I finished my first Whole30! Today is Day 31, and I did it, I actually did it. You can read about my Whole30 experience here, which also includes a full food journal of what I ate every day.
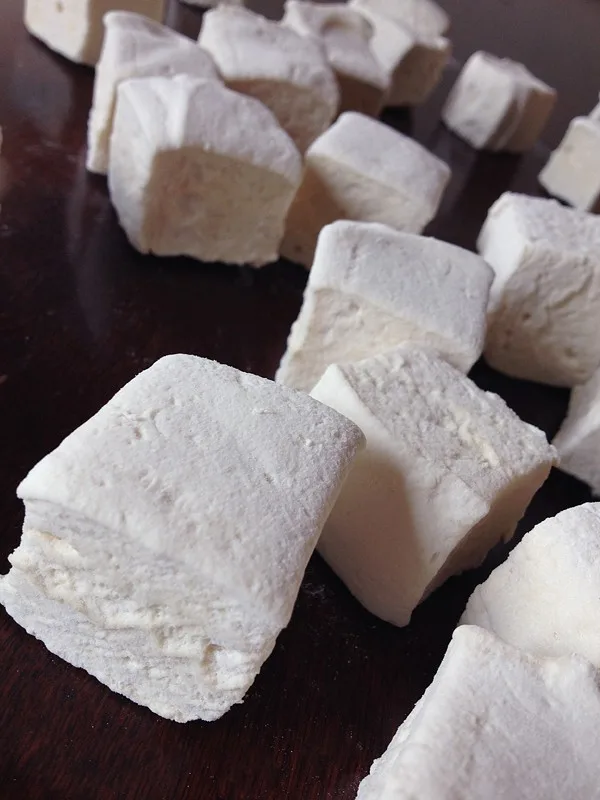
Paleo Marshmallow Recipe

Now, I’m not like some ridiculous ravenous sugar-craving monster after 30 days without sweets looking for some refined sugar, but I could go for a little something naughty, like dark chocolate, especially considering it was Easter 2 days ago and everyone in the house was shoving jelly beans and Reese’s PB Eggs in their mouths while I sat and watched. I certainly could have just saved some for myself or gone out and bought my own post-Easter-sale-candy, but I didn’t want to just dive off the wagon head first into a pile of candy. So I thought of something deliciously satisfying that wasn’t ridiculously loaded with junk, like some homemade marshmallows.

I have been saving this paleo friendly marshmallow recipe on Pinterest for a while now, and knew it would be one of the first things I made once I was done with the Whole30, i already was seeing myself making homemade marshmallows, with vanilla extract, and of course, gluten free. It did NOT disappoint! Next up is different flavors and ingredients, I’m thinking either mint or mint/chocolate, with cocoa powder, will be next. Or maybe toasted coconut. Or strawberry, or peanut butter (fluffernutter!!!), or pumpkin, or blueberry, or cinnamon. I should stop now. And make more paleo marshmallows. Ha!
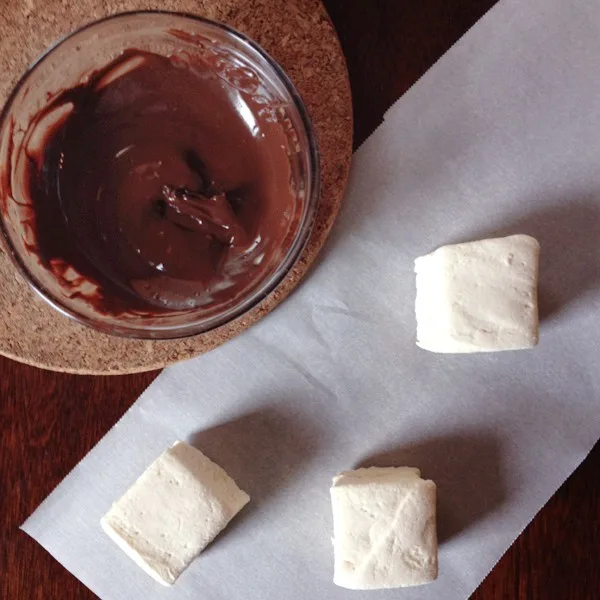
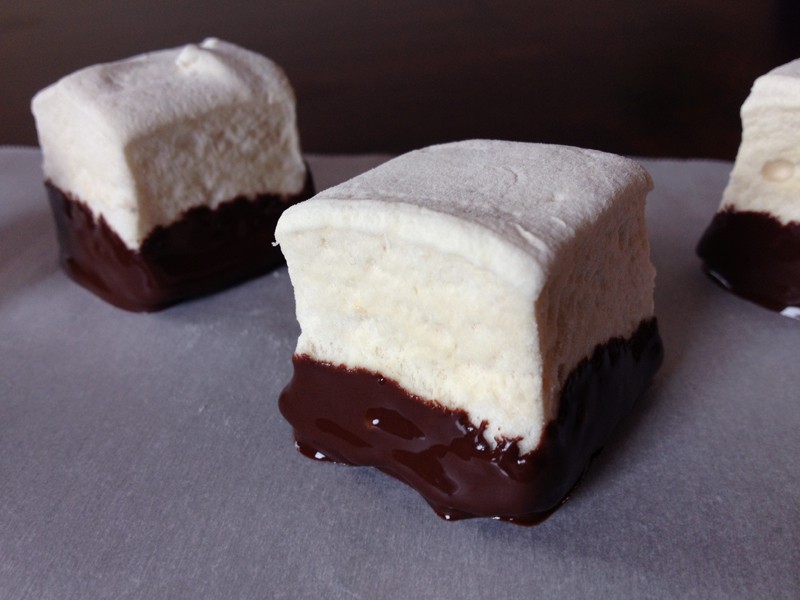
PS: You should probably most definitely dip the paleo marshmallows in chocolate. I did this as an afterthought and it. YUM.


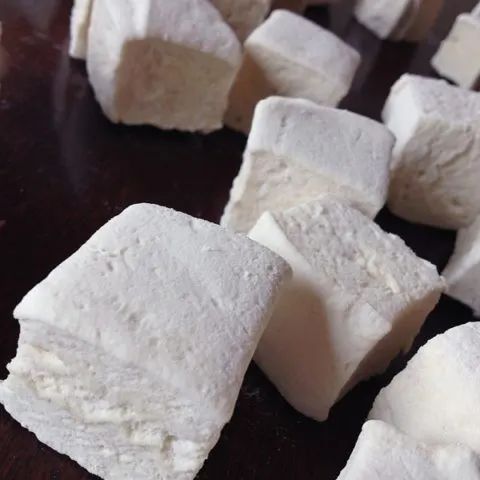
Paleo Marshmallows
Ingredients
- 1 cup Water, divided into 1/2 cups
- 3 Tbsp Grass Fed Beef Gelatin
- 1 cup Honey
- 1 tsp Vanilla Extract
- 1/4 tsp Salt
- Coconut Oil
- Arrowroot starch, you can also use other coatings such as cocoa, toasted coconut, cinnamon, etc, to coat the outsides of the marshmallow
- Chocolate, any kind you want, we used Enjoy Life Chocolate Chips
Instructions
- Line an 8×8 pan with parchment paper in both directions, leaving overlay on all sides to use as handles to remove the marshmallows when they're done.
- Lightly grease the parchment paper with coconut oil and sprinkle with a layer of arrowroot starch or other coating of choice.
- In the bowl of a stand mixer, add the gelatin with 1/2 cup of water. If using a hand mixer use a large bowl for this.
- While the gelatin is softening, pour the other 1/2 cup of water in a sauce pan along with the honey and the salt. Turn the burner on medium heat. Slowly bring the mixture to a boil. Place a candy thermometer in the sauce pan and continue to boil the mixture until it reaches 242 degrees (or the soft ball stage). Don't go over 245 degrees. *NOTE* If you're making these at elevation, decrease the cooking temperature by 2 degrees per 1,000 ft.
- This could take about 10 min up to 25 minutes depending on how hot the burner is and the size of your pot.
- Note: If your pot is too big the sugar syrup will be more likely to burn as the temp will rise too quickly and the thermometer will have trouble reading correctly. If the honey mixture foams up, watch it closely so that it doesn't over flow. You can use a spoon to break up the foam but try not to stir the actual syrup.
- When it reaches 240-242 degrees, immediately remove the sauce pan from the heat.
- If using a stand mixer, turn it on to low/med. Pour the honey mixture into the bowl in a slow steady stream down the side of the bowl, combining it with the softened gelatin. Pouring "slow" here is very important, otherwise the sugar syrup will be too hot when it hits the gelatin causing the marshmallow mixture to break later when you try to spread it.
- Be sure that the syrup and the gelatin are well combined before moving to the next step. If you need to you can even stop and stir the gelatin when half of the sugar syrup is poured, making sure it is getting mixed in and resume pouring.
- If using a hand mixer you may want to let the sugar syrup cool down to 225-230 degrees before adding to the gelatin. This is because it is much harder to pour at a slow steady stream while holding a hand mixer.
- Turn the mixer to high and continue beating until it becomes thick like marshmallow creme (about 7-10 min). These times will vary depending on the mixer and event the size of bowl used. Either way the marshmallow creme should be cooled down.
- Add the vanilla a few minutes before it's done mixing giving it enough time to mix in completely.
- Turn off the mixer and transfer the marshmallow creme to the prepared pan. Smooth the top (add more coating if using one). Pat to smooth again if needed.
- If you are not using a coating then lightly grease your hands with oil and pat smooth.This will help keep the marshmallow cream from sticking to your fingers. Alternatively you can press it down with parchment paper, leaving it there till the marshmallows are completely set.
- Leave the marshmallows to set anywhere from 1 hour to 4-6 hours depending on your gelatin, temp of the syrup and how set you want them. If you want them to look nice and clean after cutting, wait at least 4 hours, even if they seem set.
- When set, remove the marshmallows by lifting from the parchment paper flaps.
- Cut to desired size and add more coating while cutting if needed and toss them again in some starch once cut for a super nice finish.
- For best results allow marshmallows intended for roasting to dry extra long. Once cut, leave them out, covered with a cheese cloth overnight.
- Store in an airtight container (jar, bag, container, etc) for 5-7 days, not that they will last that long...
- Other coating options: Try all kinds of crushed nuts, coconut, almond flour mixed with spices, cocoa or other starches.
- Note: Using a starch works best for coating marshmallows that will be used for roasting or topping sweet potatoes. It helps them to dry out faster and the extra starch helps with the browning process.
- If you want to dip the marshmallows in chocolate, melt you chocolate of choice, let cool slightly, and either dip the bottoms or drizzle the chocolate on top. Stick in the fridge for about 5 minutes to let the chocolate harden, then store as mentioned above.
Nutrition Information
Serving Size 1 gramsAmount Per Serving Calories 1113Unsaturated Fat 0gSodium 648mgCarbohydrates 279gSugar 278gProtein 19g
Nutrition is calculated by a third party and may not be 100% accurate
Kristen
Friday 23rd of February 2024
These are amazing. I had to switch to AIP after being diagnosed with Hoshimotos and it has been a struggle. I love food and not being able to eat some of my favorites has been so hard. Literally brought a tear to my eye when I tried these tonight. I just need to find a better way to get rid of the extra starch that’s on them.
Thanks for the recipe!
Kathleen Johnson
Sunday 8th of September 2019
Made these today and they are the most yummylicious homemade marshmallows I've ever made/tasted (2nd time since 5 years ago :-) We ran out of vanilla extract, and only had almond, but it tasted even better! Also used powdered sugar for dusting top/bottom :-) Thanking God to find this healthy delicious recipe, and hope to make some rice crispy, or cookie treats with these soon. These marshmallows taste great mixed with brownies, too, and might even roast a few :-) Revelation 14:7
Natalie
Sunday 28th of April 2019
Hi there. I am not used to working with gelatin or marshmallow fluff. My kids and I made these and they are more like jello - too moist and jiggly. Is this from the temp of the syrup or not whipping it long enough or what, do you think? We let it whip in a stand mixer for several minutes, to the point it was climbing up the beaters and onto the mixer itself. Thank you!
Liz-e Patton
Monday 25th of March 2019
I want to make Rice Krispies. I’d like to think I could just mix in the puffed rice cereal then put it in a pan and it’d be cool. If u or anyone has tried this and it didn’t work please let me know!
Brook Tacheff
Saturday 28th of July 2018
These are AMAZING! With my 9 year old's new eating plan due to her diagnosis of UC. I have been spending hours trying to find amazing recipes. We are headed to camp and thought smore's would be fun. You saved the day with this recipe. Thanks so much!