
Preserve your fresh plum harvest so you can enjoy it all year long in little bite-sized cubes that are perfect for kids!

Do you know the difference between dehydrated and freeze-dried food? While both methods are used to preserve quality and extend the ambient shelf life of perishable foods, they have different outcomes:
Click here to see the comparison between dehydrated and freeze dried foods
The benefits of freeze drying far outweigh those of dehydrating and it is our preferred method of food preservation. In contrast to all the pros of freeze drying, it’s only fair to list the cons as well:
- The equipment is expensive and require regular maintenance
- Each cycle takes much longer than dehydrating, sometimes as much as 36 hours for dense, wet foods
- It’s addicting. Ok, that’s not really a “con”…
When we received an incredible bounty of plums, too much to actually eat fresh, freeze drying them was the only option. We’re not really jam/jelly kind of people, so preserving plums in that way didn’t make sense, even though it was the most “normal” thing to do.
After a bit of research, I learned that when freeze drying plums as they are, they may turn out a bit too tart. This may depend entirely on the type of plum or how ripe they are when picked, but I didn’t really want to take that risk on this harvest. To combat that possible issue, I chose to lightly sweeten them with some local honey and it turned out perfectly!
The process of taking fresh plums from the tree to long-term storage is not difficult at all:
- Rinse and remove any stems, leaves, debris, and pits
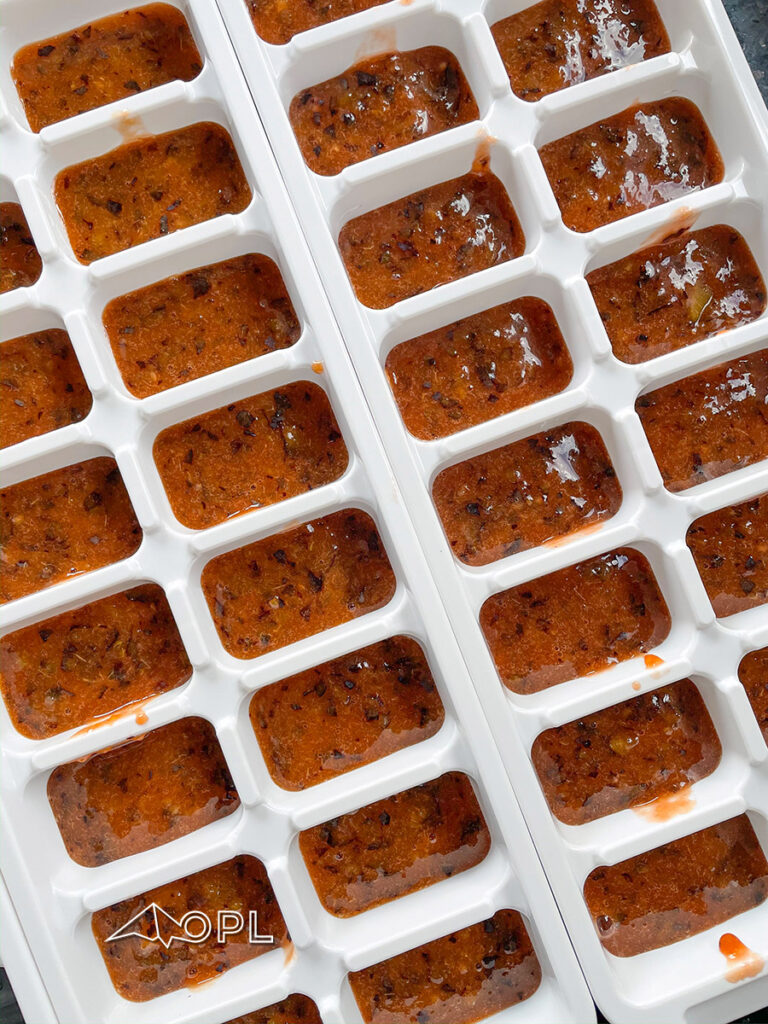
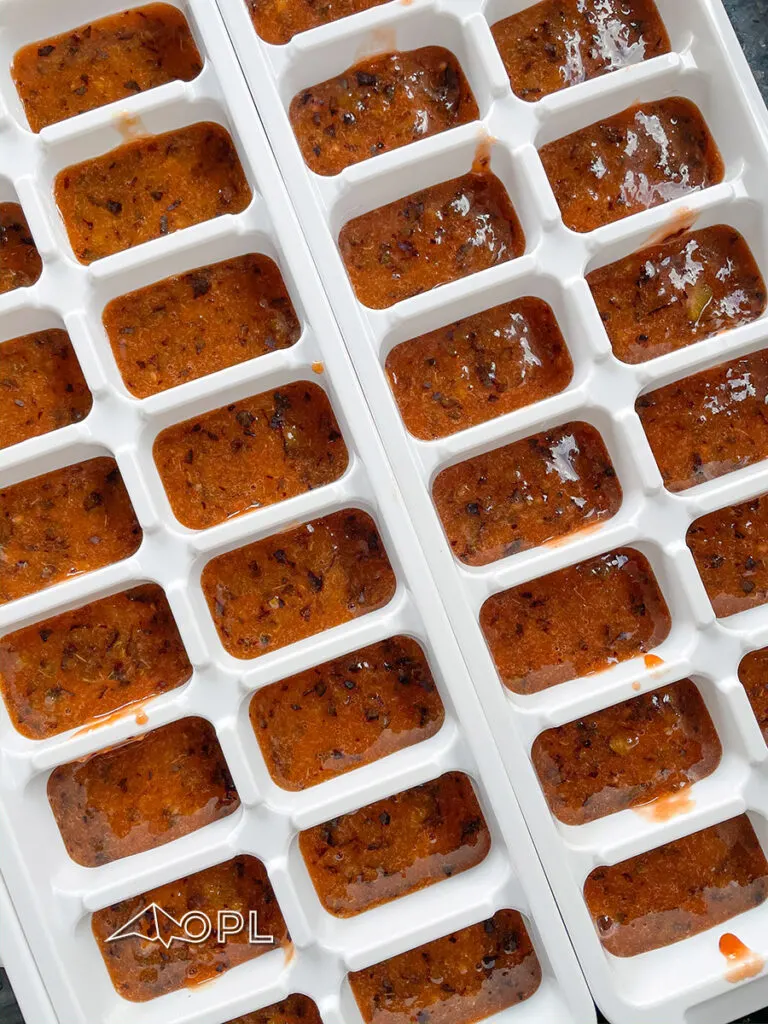
- Puree in a food processor or blender with honey
- Pre-freeze in ice cube trays overnight
- Dry in the freeze dryer (about 24 hours of hands-off time)
- Store correctly in airtight packaging (read more about that HERE)
I was curious about what type of plum tree these came from – they were a gift – and went down the rabbit hole of plum varieties.
These plums are very likely Damson Plums, which are one of the most cold-hardy varieties there are. And being that we are in zone 5B, that’s just barely within the range that plum trees can grow in (they do best in zones 5-9). The Damson Plum Tree is also one of oldest and most popular plum trees in America. Another benefit to the Damson? It’s self-fertile, so it can pollinate itself without the need for any neighboring trees if you only have the space for one.
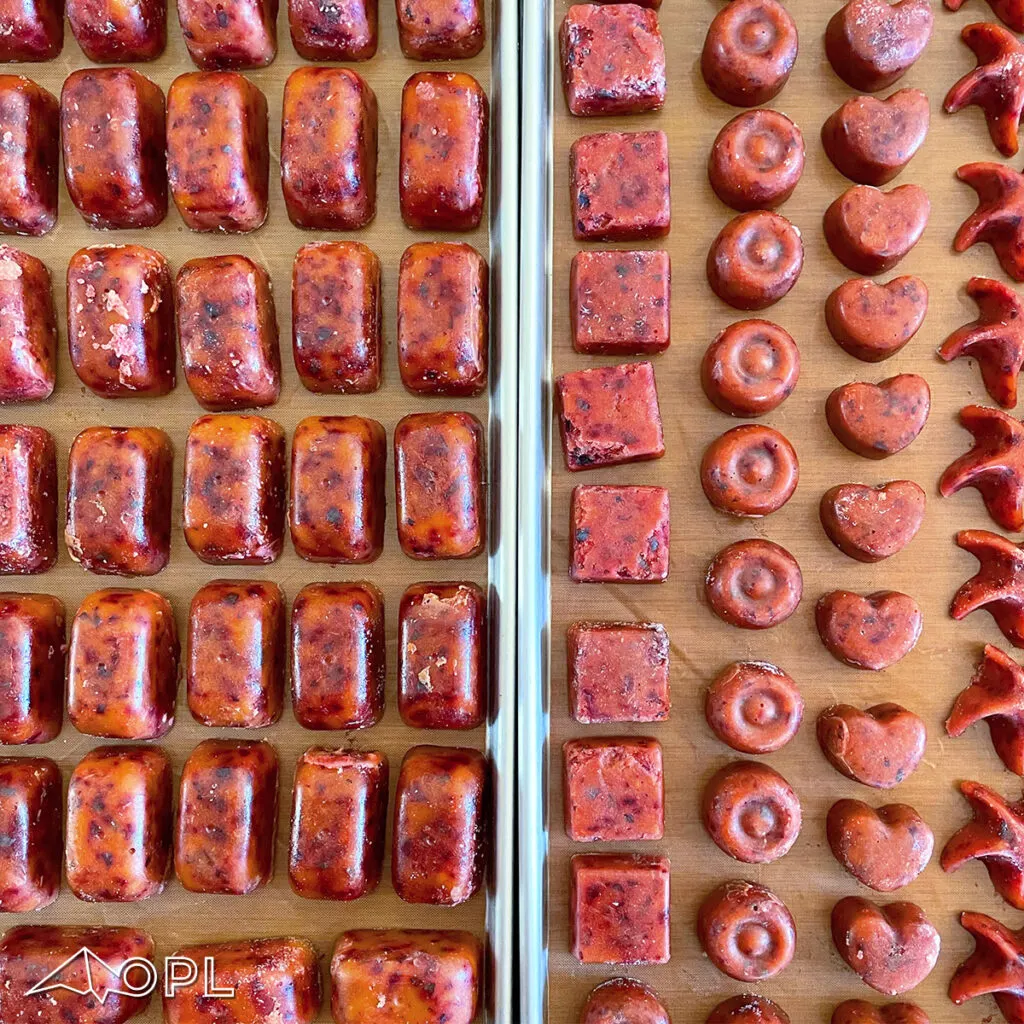
These freeze dried plum bites don’t really make it to the long-term, or even short-term storage in our house. The final texture is a bit hard to describe, but it’s crunchy and airy, though still a bit dense. As you eat them, it has a slightly chewy mouthfeel. And the flavor is just *chef’s kiss* perfection!
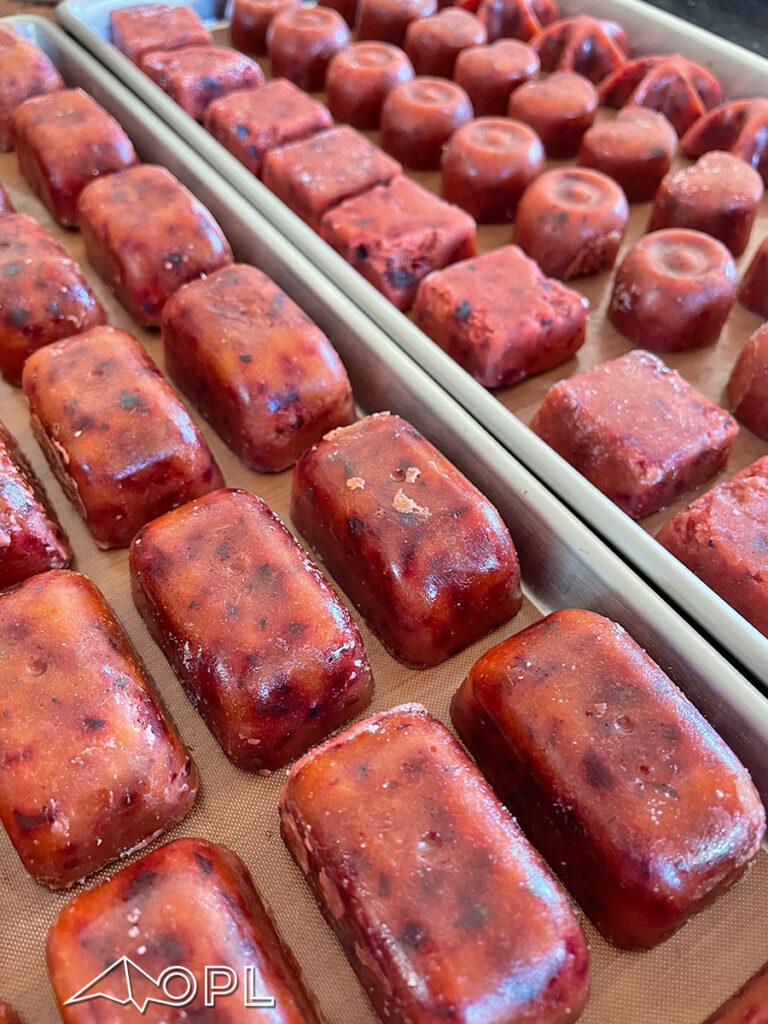

As you can see from the photo below, compared to the photo above, the size and look don’t really change from the original state. Although we used both small/novelty ice cube trays in addition to the larger, standard trays, I would highly recommend smaller cubes. This will cut down on dry time and be easier to eat as well.

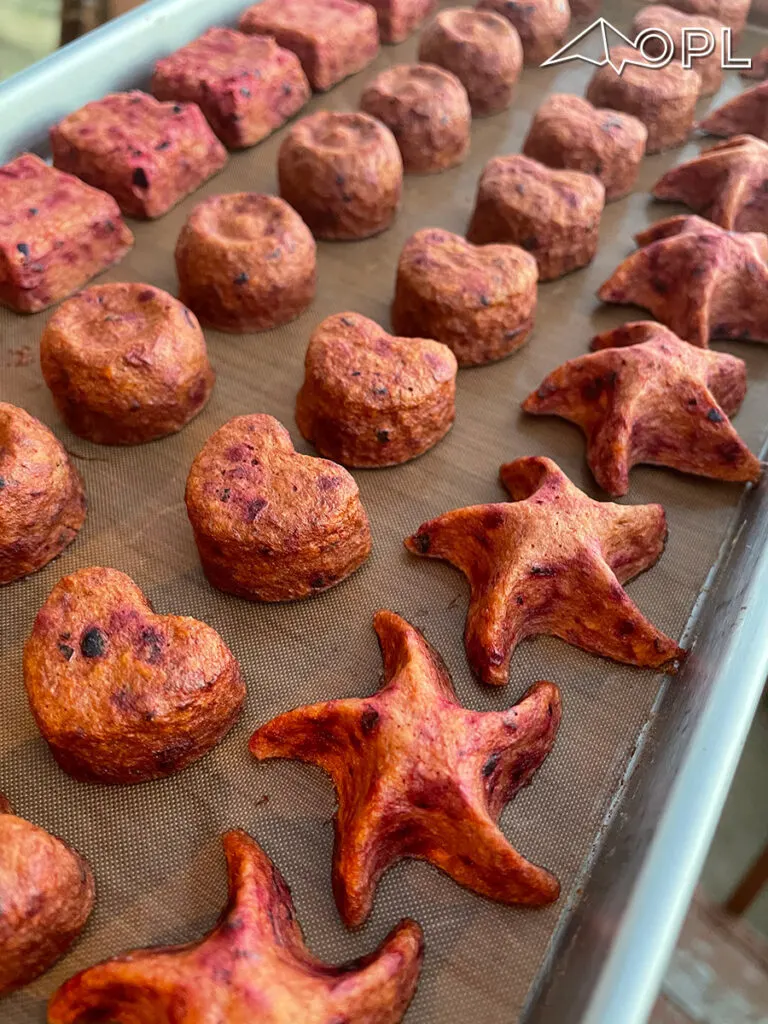
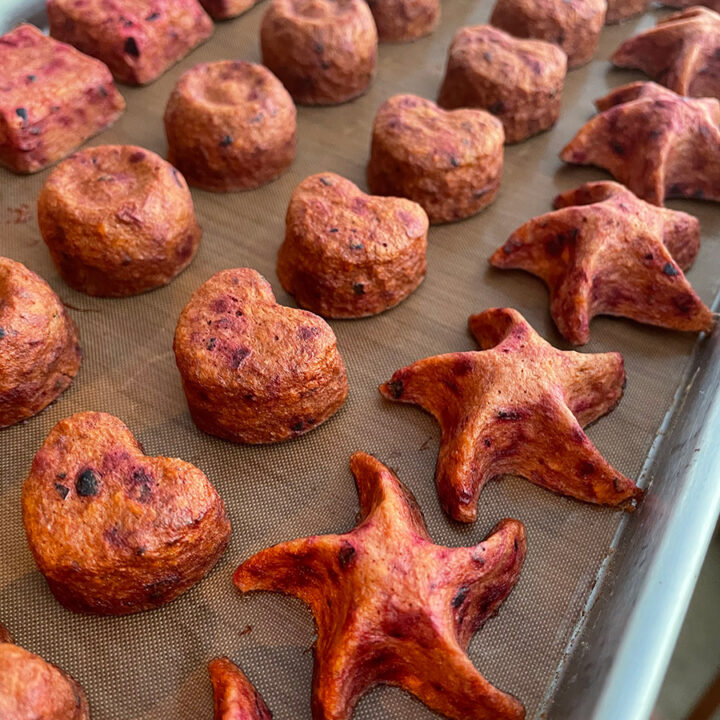
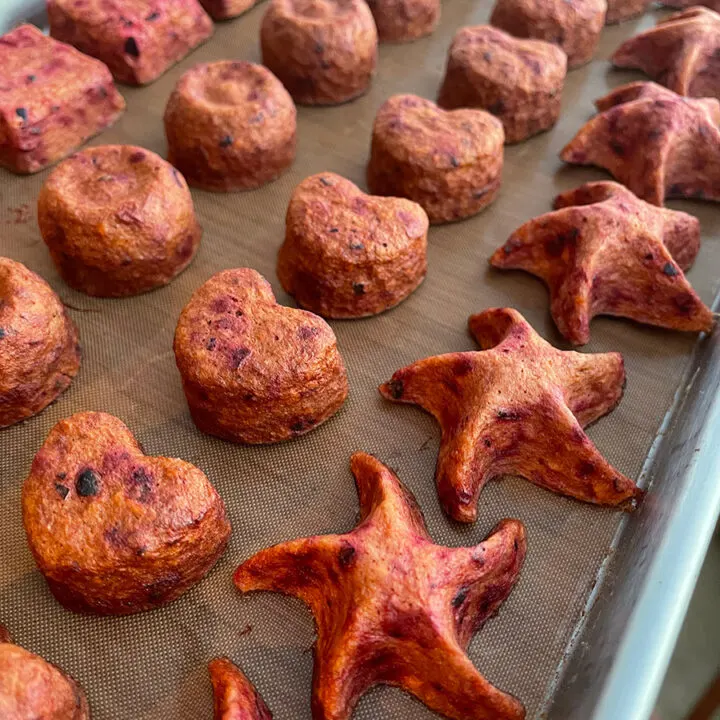
Freeze Dried Plum Bites
Ingredients
- 2 lbs Fresh Plums (weighed after pits are removed)
- 1/4 cup Honey
Supplies
- Food Processor
- Ice Cube Trays
- Freeze Dryer
Instructions
- Wash the plums to remove any dirt, sap, and debris. Remove any stems or leaves. Cut the plums in half and remove the pits. Discard the pits (or save to plant more plum trees).
- Put the pitted plums in the food processor and add the honey. Lock the lid on and process until soupy. It won't be perfectly blended, bits of the skins will still be visible, but you shouldn't have any chunks of fruit remaining.
- Pour the plum puree into your ice cube trays. If you are using standard ice cube trays, do not fill all the way (this will add time to the drying cycle in the freeze dryer). Place filled trays in the freezer until puree is solid.
- Line freeze dryer trays with parchment paper or reusable liners. Place pre-frozen cubes on the lined trays, not quite touching one another. Put trays in the freeze dryer and run on the standard cycle. If drying full-size cubes, add about 5-7 hours to the dry cycle.
- When cycle is complete, check to be sure the cubes are dried all the way through (not chewy, not cool to the touch). Store in an airtight container (preferably with an oxygen absorber for long-term storage) at room temperature and out of direct light.